RDS creation
RDS creation#
Here we will go through the steps to create your first database in RDS.
Go to your AWS management console ( refer to AWS installation instructions ).
Attention
Make sure your region is in AWS US West (Oregon) region.
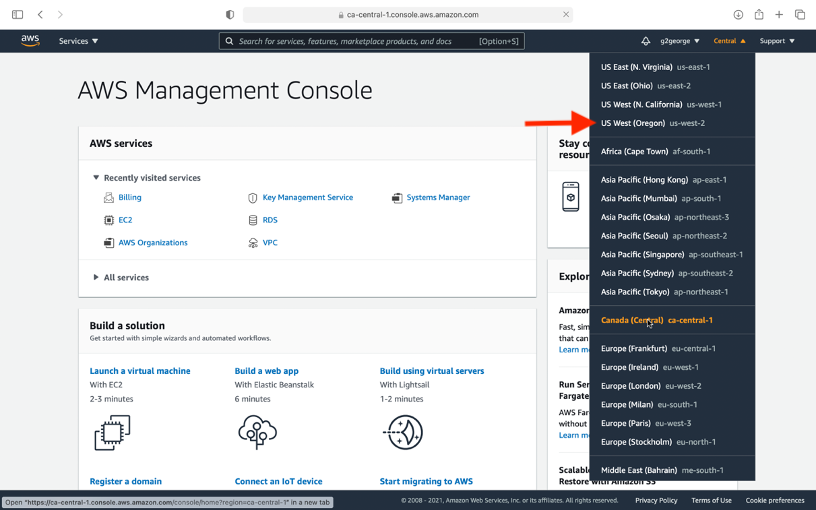
Select the RDS from the Services list
SERVICES–>DATABASE–>RDS

Click on
DATABASES
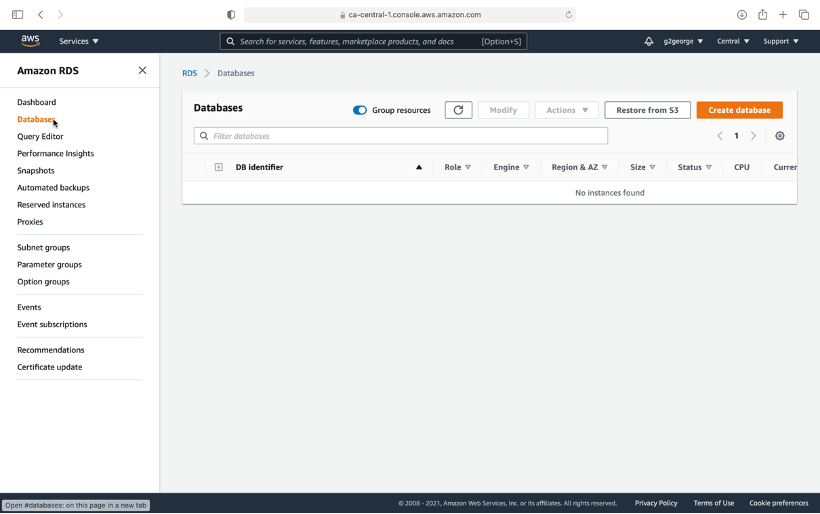
As you see here, you don’t have any database running. Are you ready to create one? Stay with me…
Click on
CREATE DATABASE.

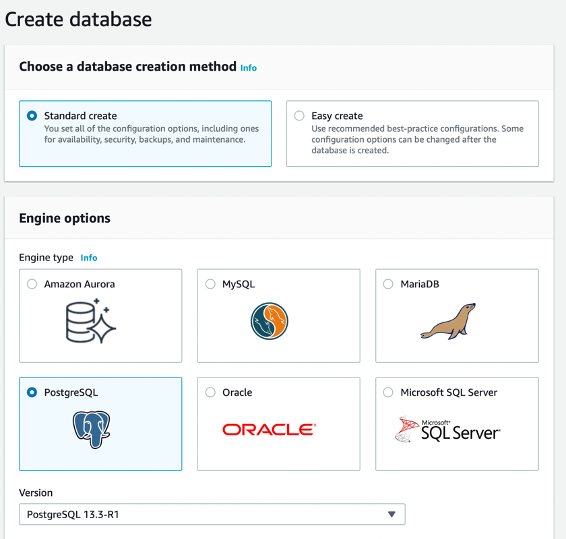
This will take you to the console, where you can see various options for creating your database, starting with the type of database you want to create.
Let’s go through each option one by one in the following screenshots.
Here, we are selecting the database engine that we want. As you see, there are 6 of them available, and we will be going with Postgres. You will be hearing more about it in your Lecture 2. Here we also select which version of Postgres we want.
Here I selected Postgres version PostgreSQL 13.3-R1. I have tested out this version and hence recommend it.
There are 3 different templates that you can choose from. Here I am selecting Dev/Test. Once I select Dev/Test the Availability and durability changes to Single DB instance.
Note
You are using a student version of AWS, and you won’t have access to many options.
In settings, you need to pass a DB instance name and note this as it is important information to connect to your database.
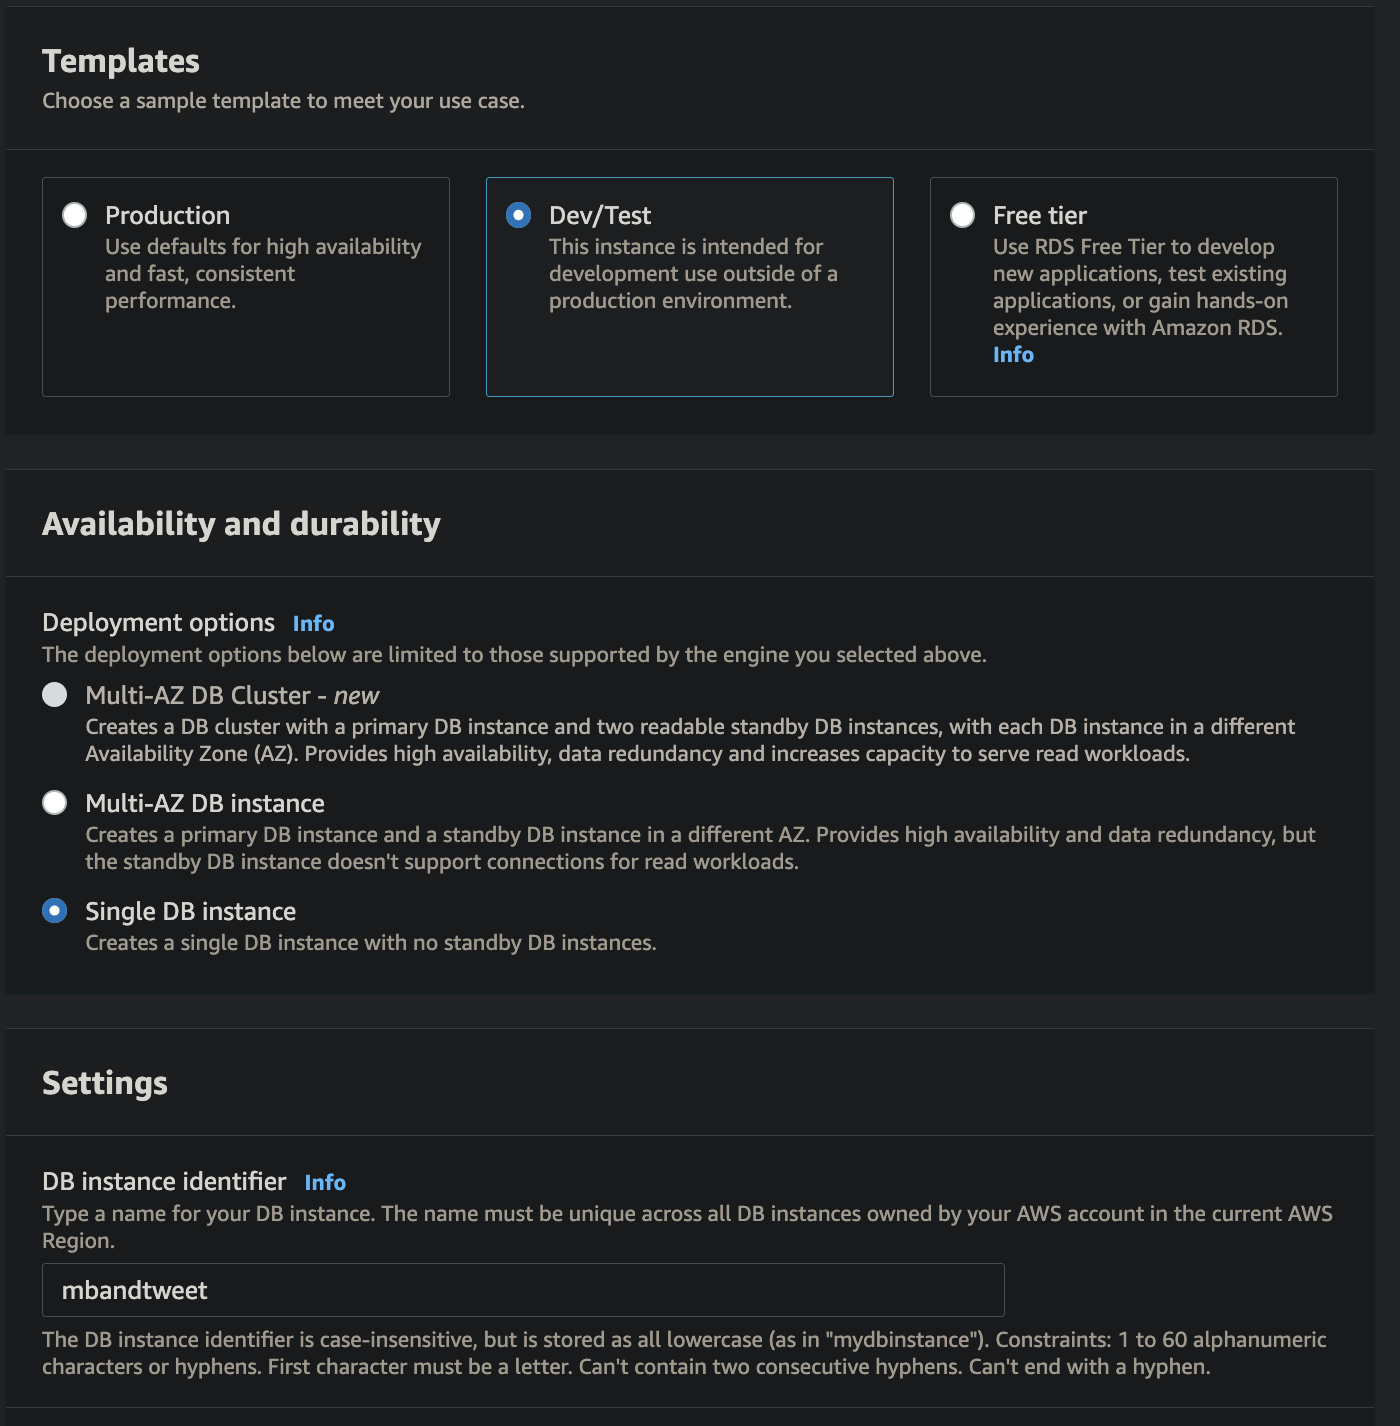
Please ensure you don’t forget the Master username and Master password as we also want this information to connect to our database.

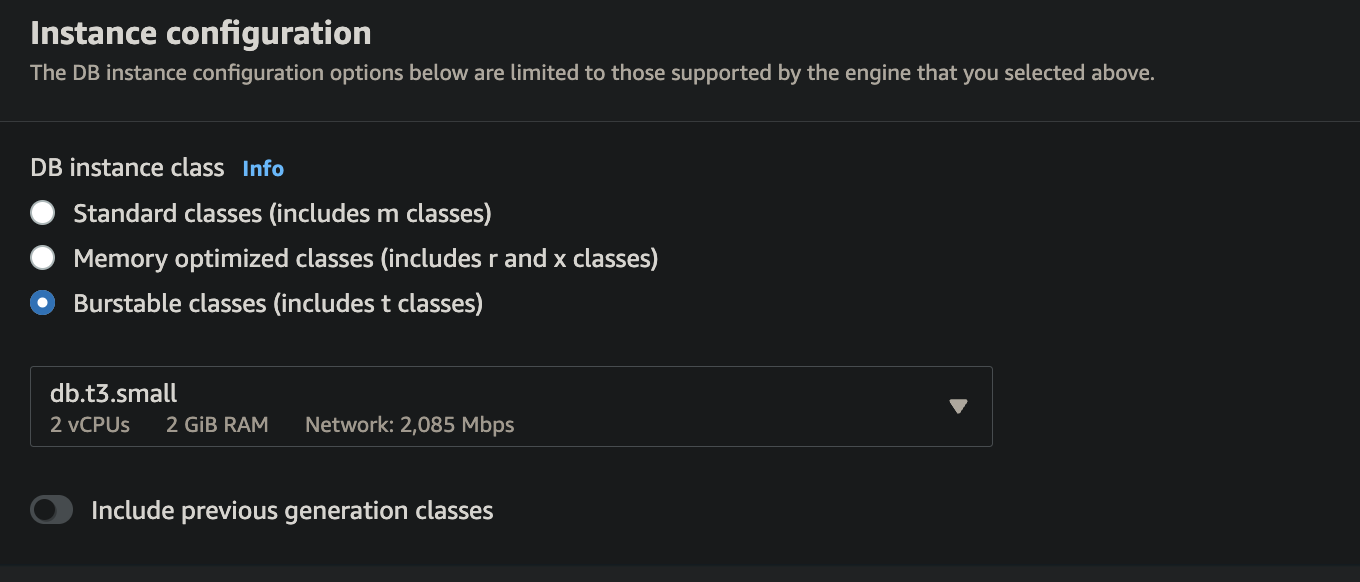
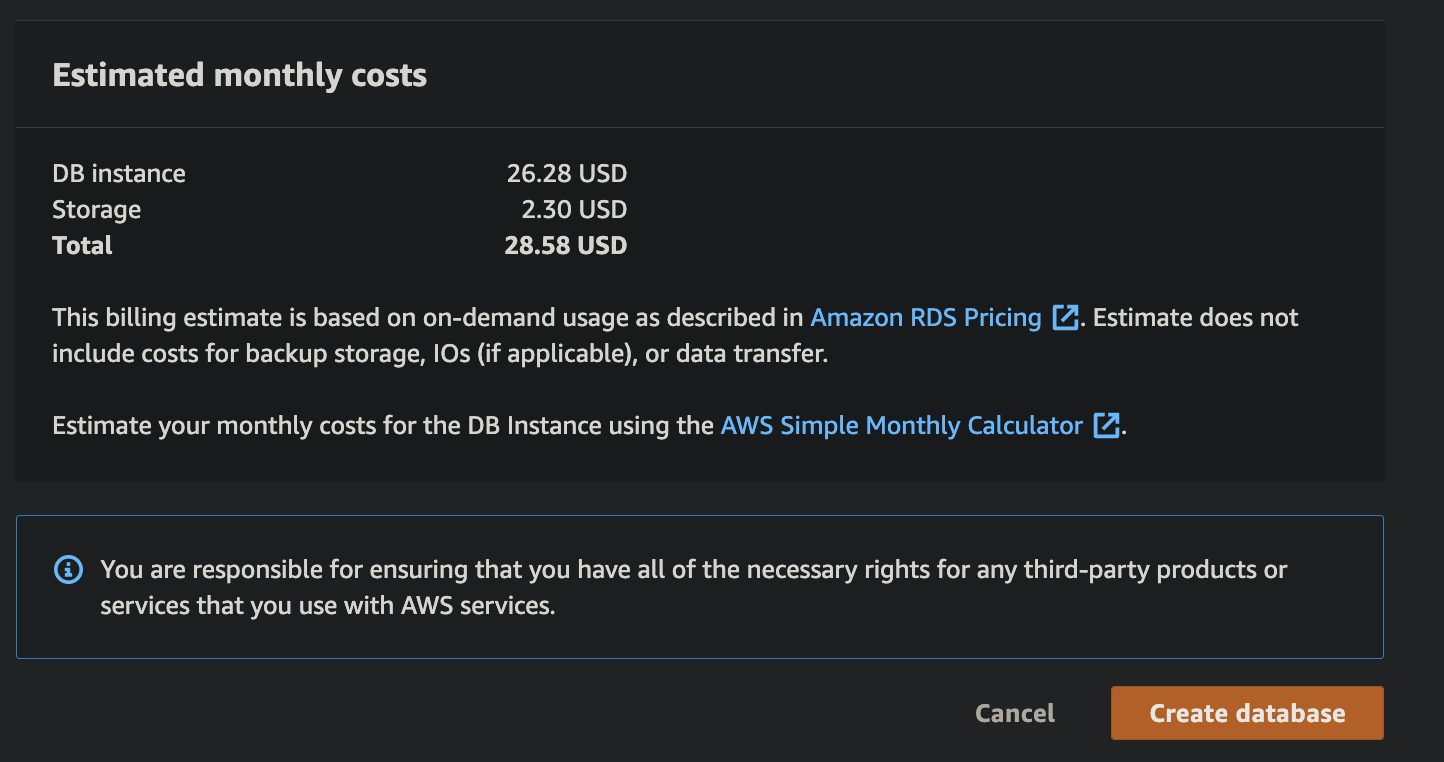
Now we want to select how powerful your database needs to be. Here I am giving an instance db.t3.small, which is of 2 core CPU and 2GB RAM (which is very small). You can also try to spin other bigger instances like db.t3.medium, but please make sure you do proper budgeting on the 100$ credit that you got. The cost that is showing at the end is the Estimated monthly cost if you run your database for all month. But you can stop your database when you are not using it. But usually, students (even me forget to stop the database when not in use) so I tend to spin the small instance so that I don’t use up all my credits (also, it is okay to leave it running)
Warning
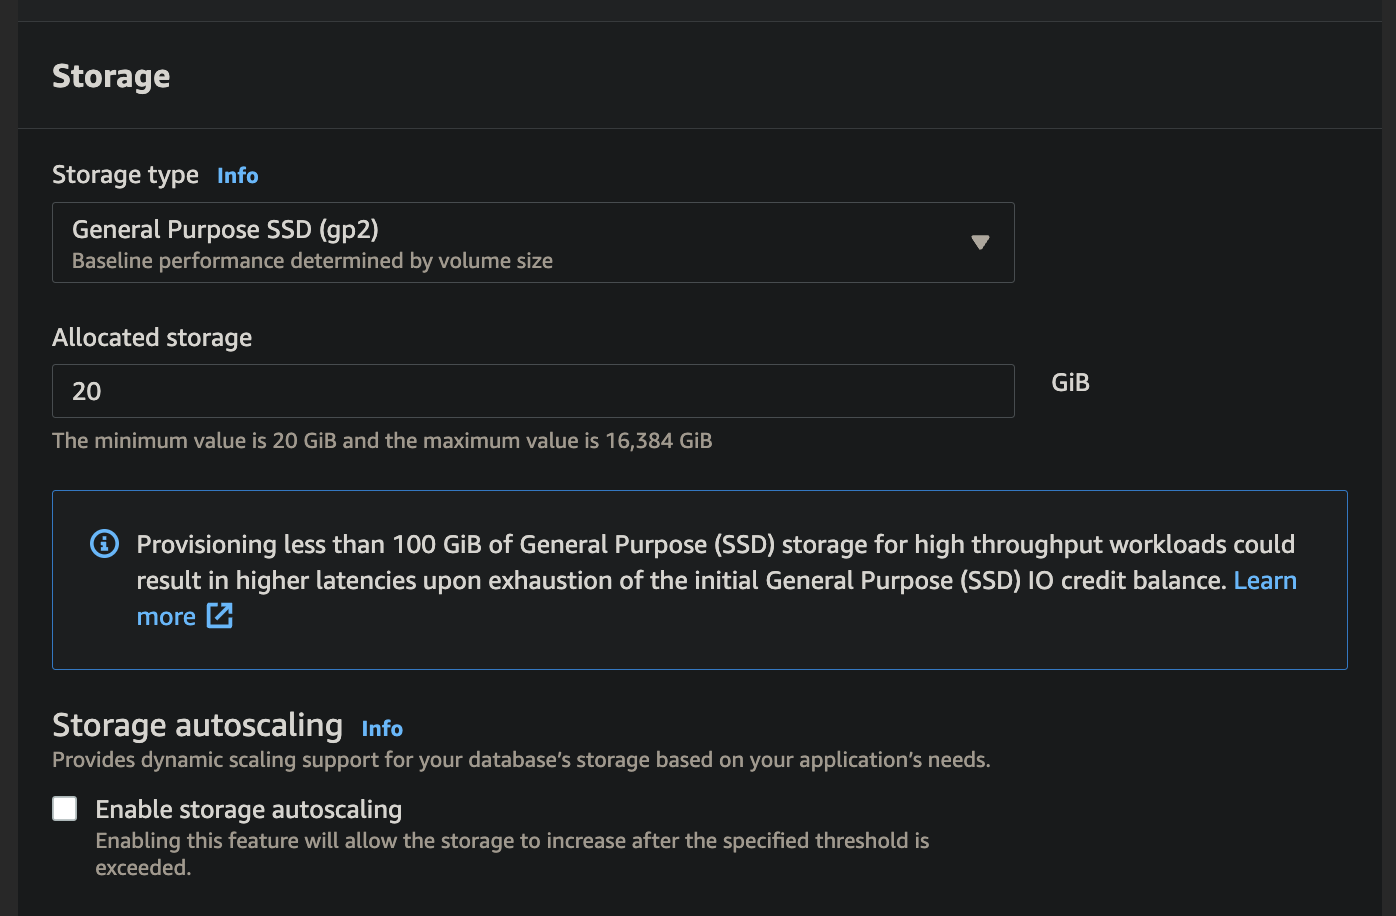
Make sure you select Storage Type to be General Purpose SSD(gp2) and Allocated storage to be 20 or 30 GB - We are doing this to reduce some costs.
Uncheck Enable storage autoscaling
Everything leave default.
Important
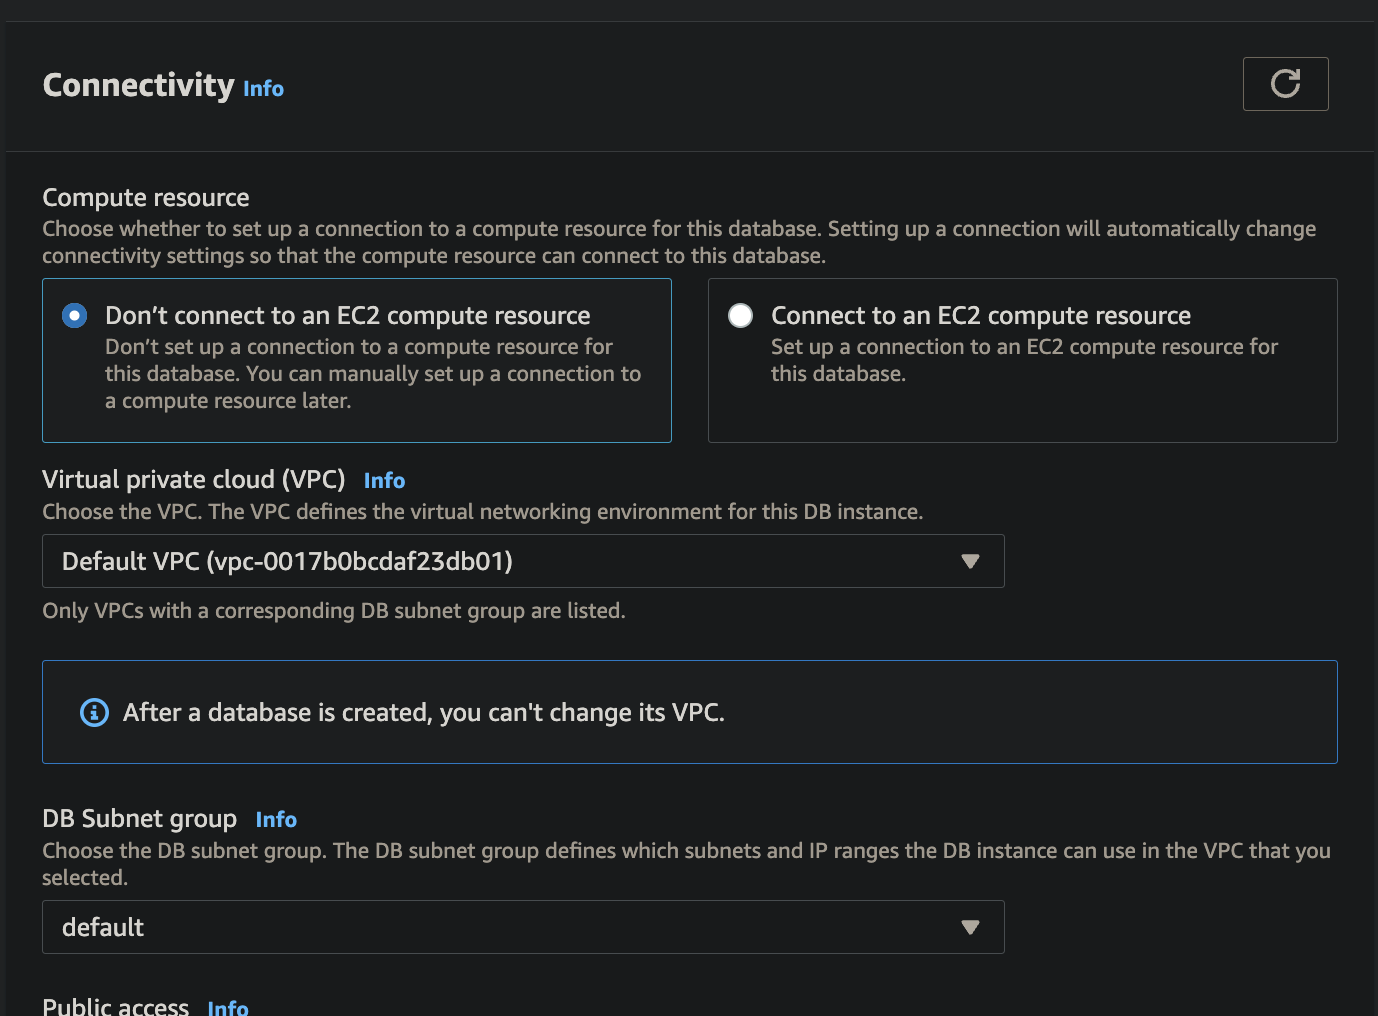
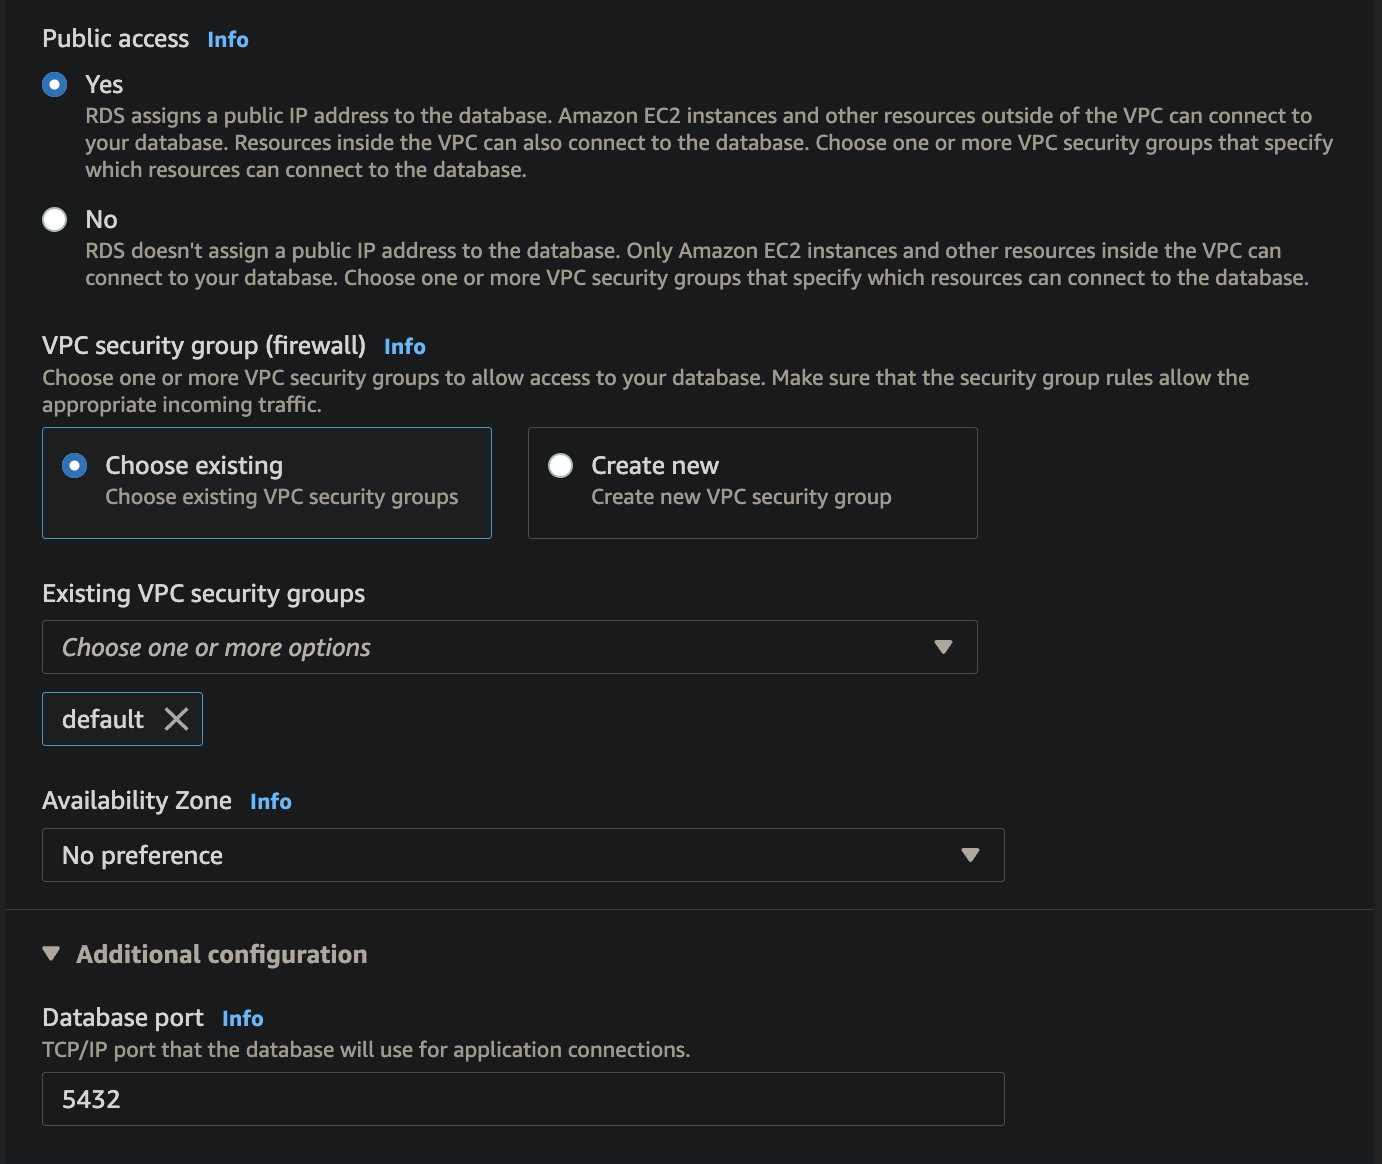
Make sure you select Public access to Yes
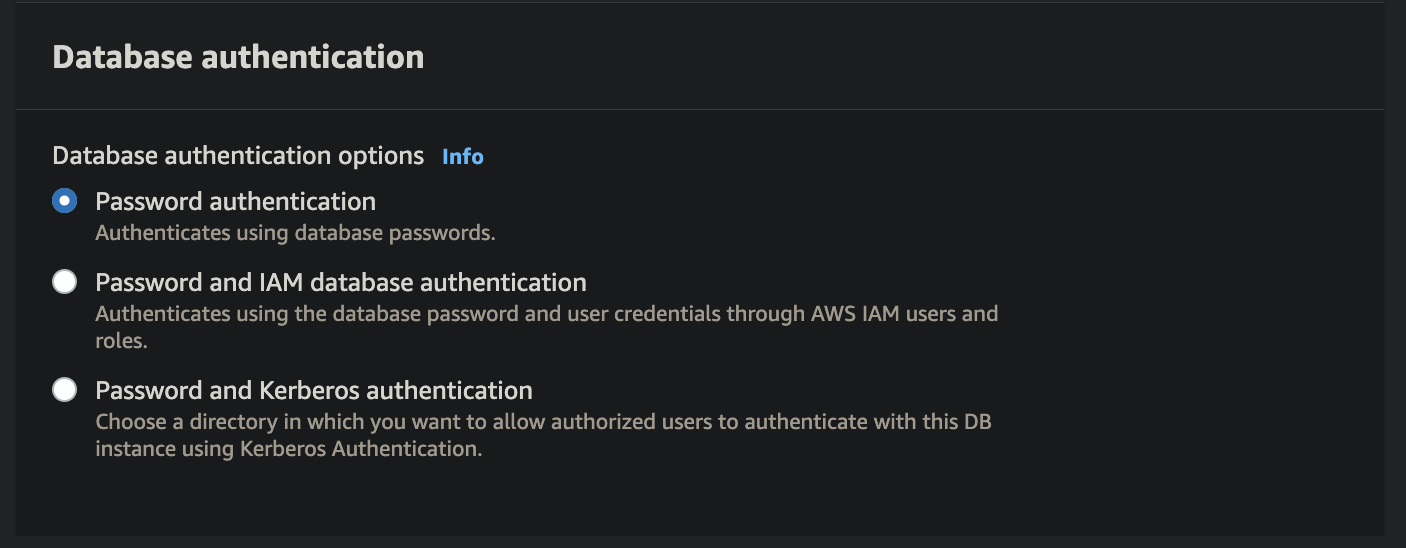
Please uncheck everything here, as you don’t have permission to do it.
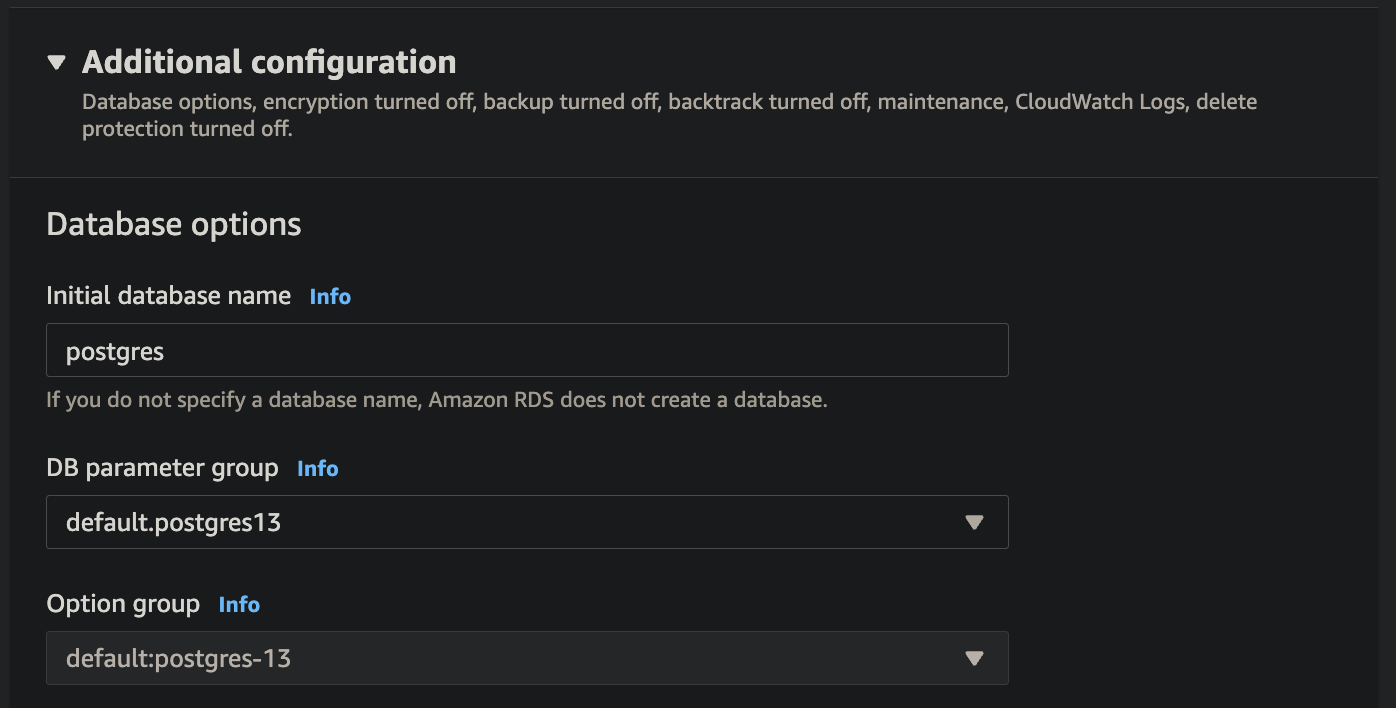
Make sure you give a name to your initial database. We want to know the database name, so please note it
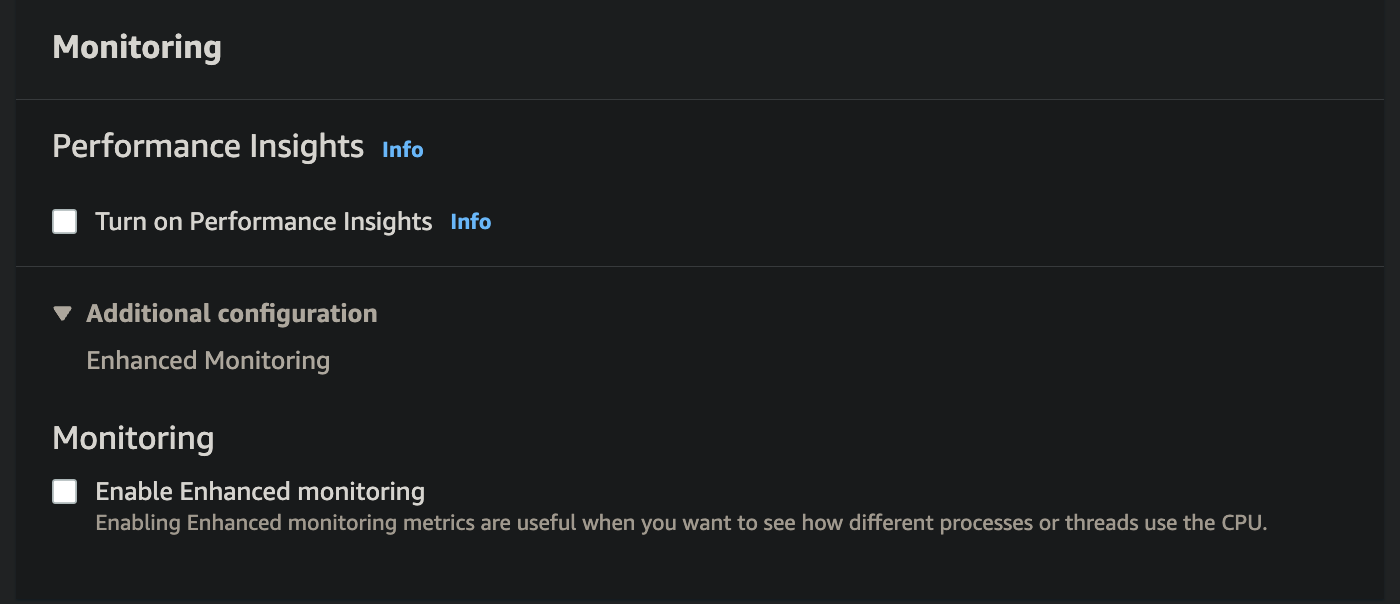
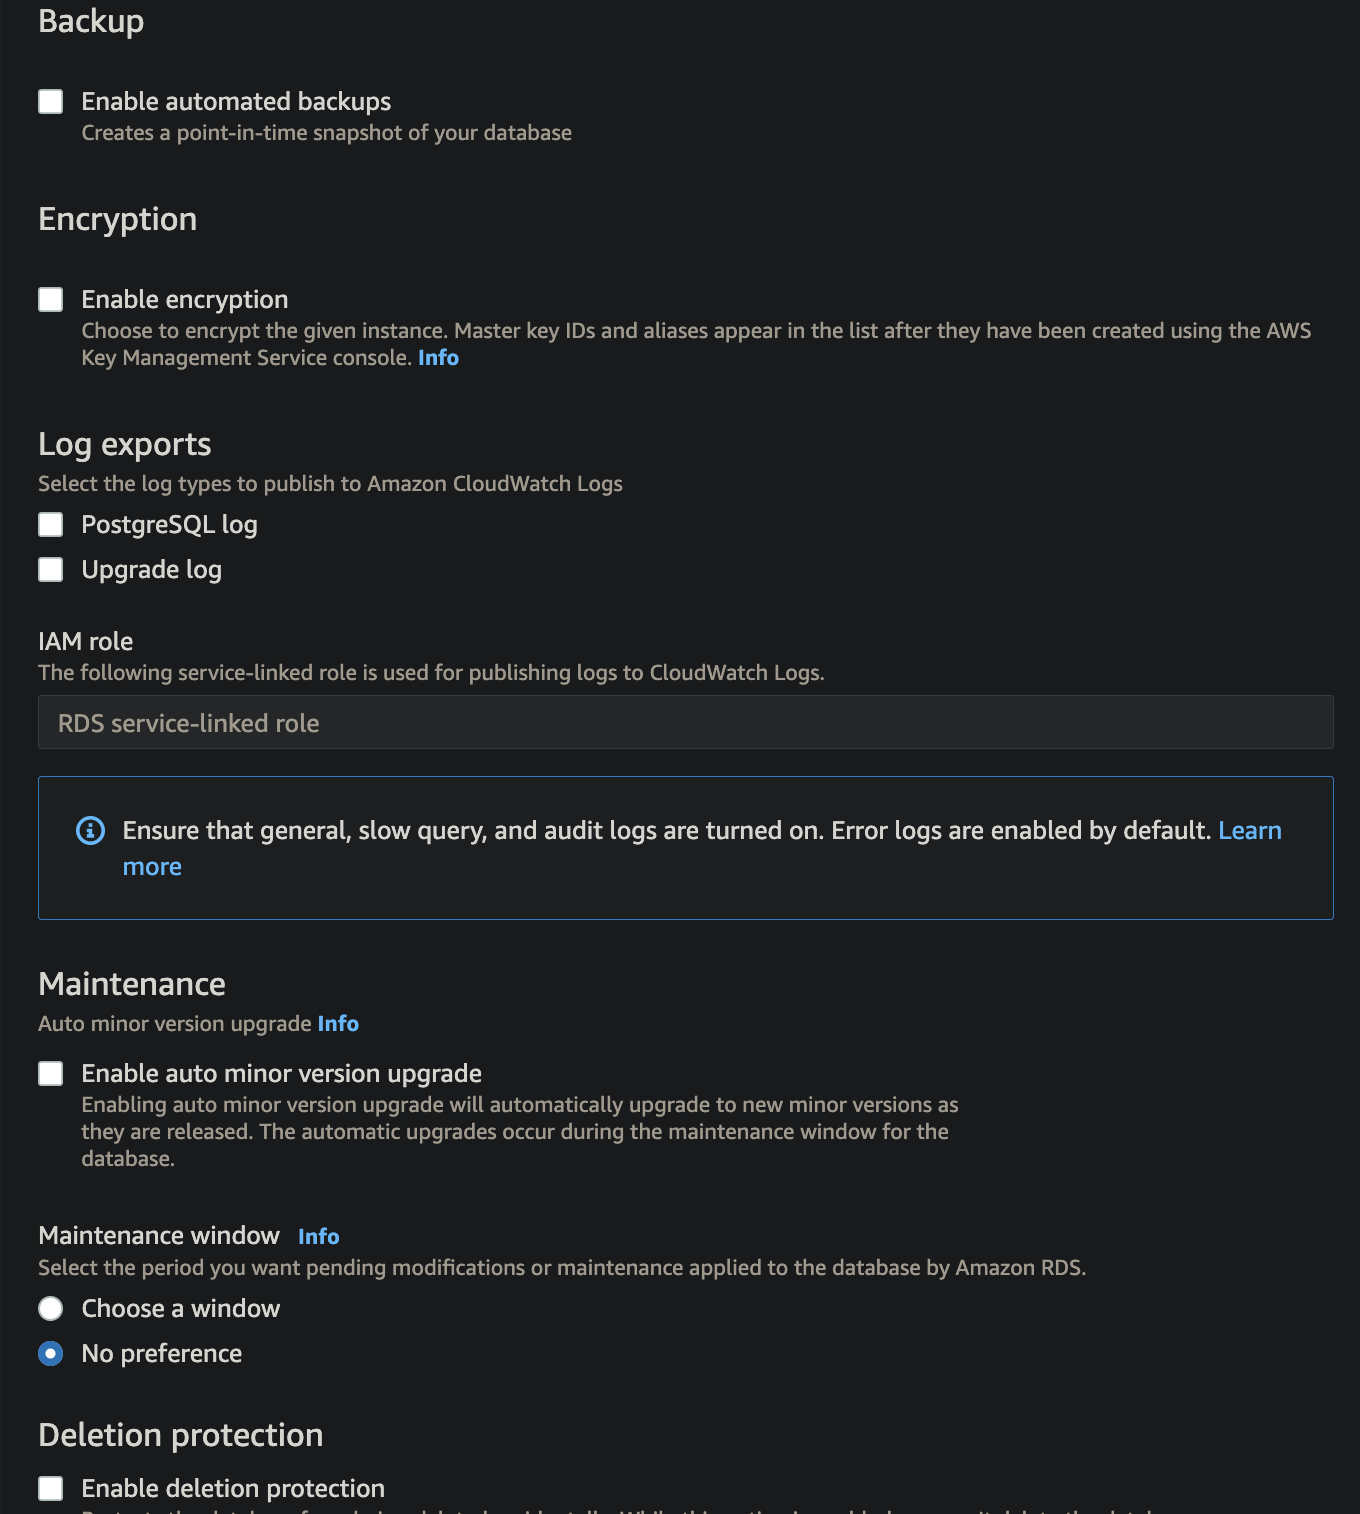
Uncheck everything like in the screenshot below.
Review the total cost. This cost is if you run the database for an entire month. You can practice by spinning up multiple databases (for your worksheets, assignments, and if you want to try something else). But you have to be aware that you are only given 100\( so if you plan to spin a bigger instance, then it makes sense to stop it when you are not using it. You can always start the database when you want to resume it. But please be aware that starting and stopping takes some time. So if it is a small instance like this, then it is okay to leave it on. After all, you want to use these mainly for your first 4 lectures, so please feel free to utilize the 100\) credits you have.
Click on CREATE DATABASE. Sit back and relax AWS is setting up your database in the cloud.
Note
If you get any error, Check
If the region is AWS US West (Oregon).
If you unchecked everything under Additional configuration.
Revisit the screenshots to see if you got the configurations correctly.

Attention
This process might take some time. For me, it took around 10 min. Better you grab some coffee.
Important
This database is available only in AWS US West (Oregon). So if you come here later to start/stop your database and don’t find your database, then it’s mostly the case that you are looking in a different region.
After your coffee, you will see your database available.
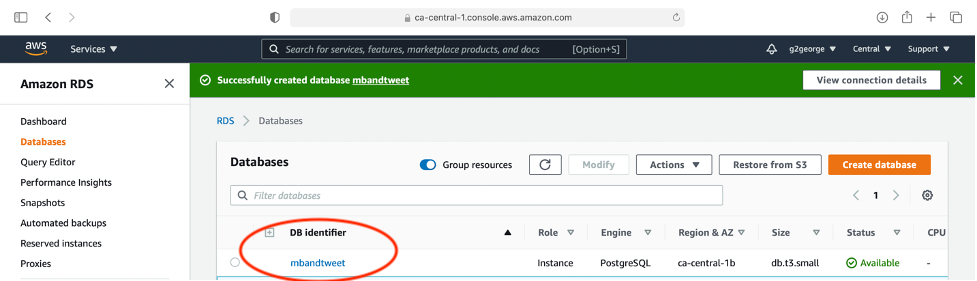
Once the database is up and running, we need the server details and credentials to access this database.
Click on the DB identifier (I marked red in the previous image).
This contains details for connecting to the database that you created now.
After you click on that you will see details on the database that you created

Important
We need following information to connect and load data to the database you created;
Capture the endpoint and port (circled in green).
Master usernameandMaster passwordyou used when you created the database.initial database nameyou used when you created the database.
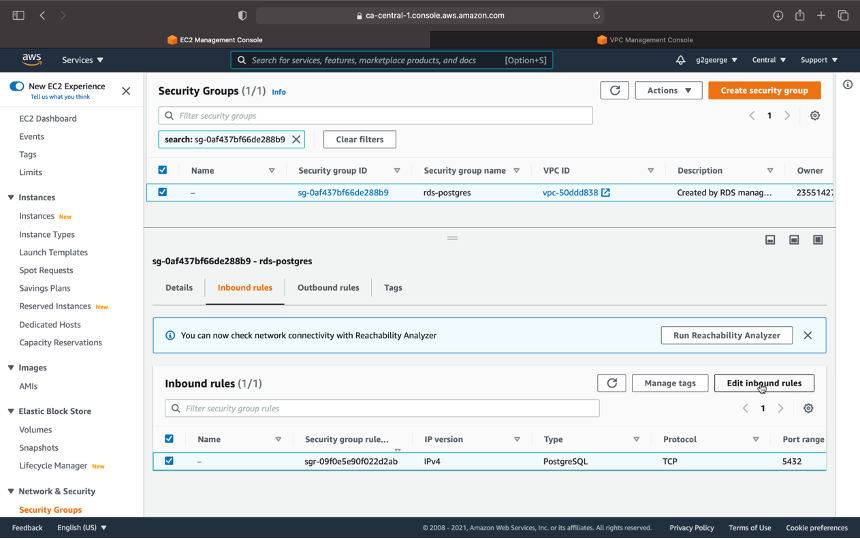
We also need to make some changes to the security group; here, it controls the range of IPs this database can accept connections.
Click on the VPC security groups under the Security. (Check the previous screenshot, marked red). This will take you to the Security group settings ( the screenshot that you see below); after this, follow the instructions given below.
Click on edit inbound rules
Before we change this, let me tell you why we want to do this. By default, this database only takes connections from your IP (the laptop you are using now). However, your laptop IP is dynamic and can change based on the Wi-Fi that you are using. Since this is not a production database and nothing sensitive is in there, so it’s okay to accept connections from anywhere; do as shown in the following 2 screenshots (not advised to do something like this when you start working in the industry, most of the cases these security group related things would be managed by a different team, so you have to less worry about it as data scientists/ analysts).
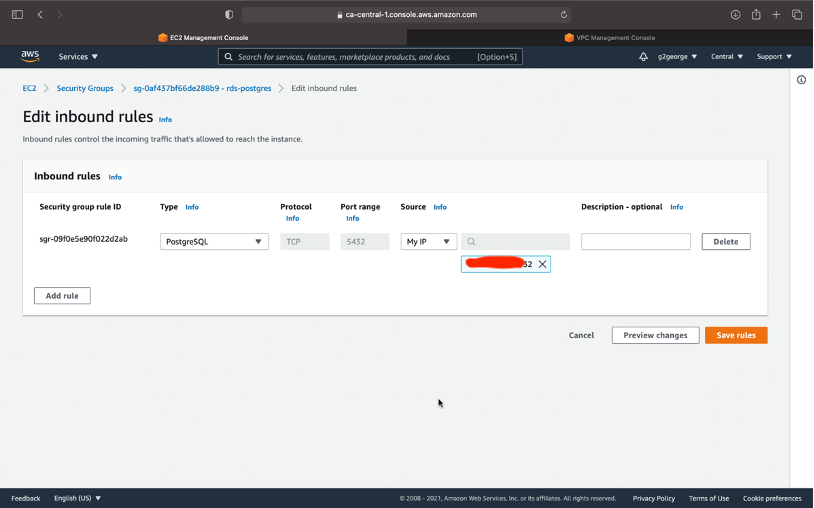
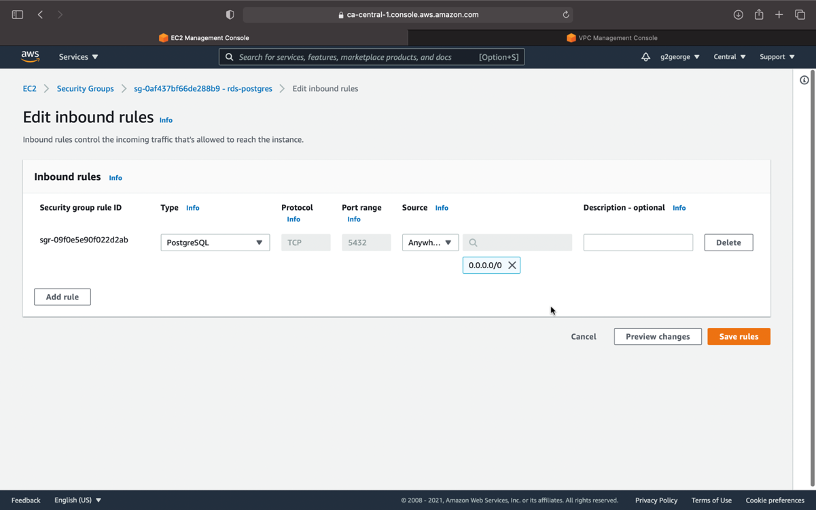
Save rules…This completes the task that you need to achieve from the AWS side. Remember you got the hostname and port. Next, we will be setting up the Postgres client in your local computer to access this database.
Here is another set of instructions available online to create and connect to the RDS instance. It’s good to check out these if you want to know more about various options. We will be touching upon some of the options in our Lecture 2.
Congratulations, you spun up your database in the cloud !!

Tip
Remember you created your database in the region us-west-2 Oregon. If you don’t see your database when you log back, it could be that the region is us-east-1 Viginia, so you have to make sure you change the region to us-west-2 Oregon